
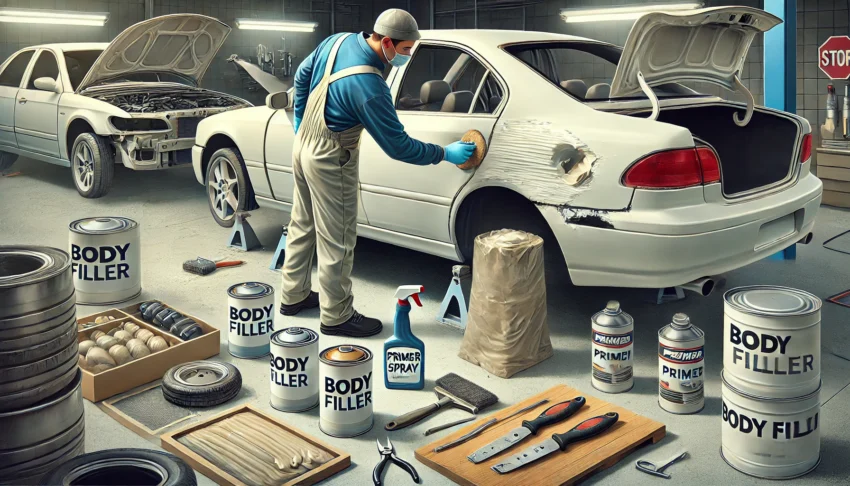
Automotive body filler is a key component in vehicle body repair, allowing professionals and DIY enthusiasts to fix dents, scratches, and minor damage. Whether working on a small car repair or a full auto body restoration, selecting the right body filler can make all the difference in achieving a smooth, flawless surface.
When used properly, body fillers and putties help restore the shape and integrity of a car’s body panel. Brands like Evercoat, 3M, and Bondo offer a range of high-quality body fillers that cater to various repair needs. Understanding the application and sanding process is crucial to achieving professional results.
In this guide, we will explore everything you need to know about automotive body filler, including how to apply body filler, selecting the right repair filler, and achieving the perfect finish. Let’s dive in!
Understanding Automotive Body Filler
What is Automotive Body Filler?
Body filler is a great material used in auto body repair to smooth out dents, scratches, and imperfections. It consists of a polyester resin base that hardens when mixed with a cream hardener. This filler is designed to adhere to metal and fiberglass surfaces, providing a durable and sandable surface.
Different Types of Body Fillers and Putties
There are three different types of body fillers and putties used for repairs:
- Lightweight body filler – Ideal for minor dents and scratches.
- Gold lightweight body filler – A premium-grade option offering better adhesion and flexibility.
- Fiberglass body filler – Designed for heavy-duty repairs, providing additional strength.
Each type of filler has its unique characteristics, and selecting the right one is crucial for automotive repair.
How Body Fillers Work
Body fillers consist of a mixture of polyester resin and a hardener. When combined, they create a chemical reaction that causes the filler to harden. The process typically involves:
- Applying filler to the damaged area
- Sanding body filler to achieve a smooth finish
- Featheredge sanding to blend the filler seamlessly with the rest of the body
Using the correct type of repair filler ensures a lasting and effective restoration.
Selecting the Right Body Filler
Three Different Types of Body Fillers
Choosing the right automotive body filler depends on the extent of the damage. Here’s a breakdown of the three options:
- Standard Fillers: Best for small dents and scratches.
- Premium-Grade Fillers: Provides better adhesion and durability.
- Fiberglass Fillers: Ideal for heavy-duty body panel repairs.
Lightweight Body Filler vs. Premium Grade
Lightweight filler is easier to apply and sand, making it ideal for beginners. However, premium-grade body fillers like Evercoat Rage Gold and Platinum Plus Body Filler provide better adhesion and flexibility.
Evercoat, 3M, and Bondo – Which One is Best?
- Evercoat Rage Ultra – Known for its superior sanding properties.
- 3M Bondo Body Filler – A popular choice for DIY enthusiasts.
- Evercoat Lite Weight Body – Offers a balance of affordability and performance.
Each of these fillers has unique benefits, so selecting the right one depends on the type of repair being performed.
How to Apply Body Filler for the Best Results
Step-by-Step Guide on Applying Filler
Applying body filler correctly is essential to getting the best results. Follow these steps:
- Prepare the surface – Sand and clean the damaged area.
- Mix your filler – Combine the polyester resin with a cream hardener.
- Apply body filler – Spread an even layer using a plastic spreader.
- Let the filler dry – Wait for the completely dry filler before sanding.
- Sand and smooth – Use sanding body filler techniques for a seamless finish.
Tools Required for Applying Body Filler
- Plastic spreader – Helps spread the filler evenly.
- Putty knife – Useful for shaping and leveling.
- Hardener – Ensures proper curing.
- Sandpaper – For achieving a smooth surface.
Importance of Using a Cream Hardener
Using the right hardener ensures that the filler sets correctly and bonds well with the surface. Without it, the repair filler may not dry properly, leading to imperfections.
Preparing the Surface Before Applying Filler
Sanding Body Filler: Why is it Necessary?
Before applying automotive body filler, it’s crucial to remove old paint, ensure a clean surface and sand it properly. Sanding helps remove dirt, rust, and old paint, allowing the filler to adhere better to the body panel. If the surface isn’t sanded correctly, the repair filler may not bond well, leading to weak and uneven repairs.
To get the best results, follow these steps:
- Use 80-grit sandpaper to remove paint and create a rough texture.
- Ensure the area is free of bugs, dust, and grease.
- Clean the panel using a degreaser before applying the body filler.
Proper sanding is a vital step in the application and sanding process and ensures that the body fillers and putties perform as expected.
How to Treat Rust and Scratches Before Application
If rust is present on the damaged area, it must be removed before applying the filler. Ignoring rust can cause it to spread underneath the repair, leading to future damage. Here’s how to handle rust:
- Use a grinder or sandpaper to remove rust completely.
- Apply a rust treatment solution to prevent future corrosion.
- Use fiberglass body filler for areas prone to rust, as it provides additional strength.
For scratches and minor dents, lightweight fillers such as Evercoat Lite Weight Body or Bondo Body Filler are effective.
Using Auto Body Repair Techniques to Fix Damaged Areas
Different auto body repair techniques can be used depending on the type of damage:
- Shallow dents can be repaired with putty and spreader.
- Deep dents may require multiple layers of filler.
- Fiberglass resin is used for heavy-duty body repair.
Proper body repair techniques ensure a smooth and long-lasting finish.
Mixing and Applying the Body Filler
How to Mix Your Filler Properly
Mixing body filler correctly is essential for a successful repair. Follow these steps:
- Take the required amount of polyester resin.
- Add the recommended amount of cream hardener.
- Mix thoroughly until you get a uniform color.
Using the right ratio of hardener is crucial. Too much will cause the filler to harden too quickly, while too little will prevent it from curing properly.
Ensuring a Smooth Surface by Using a Spreader
A plastic spreader is used to apply automotive body filler evenly. When applying filler, follow these tips:
- Apply thin layers rather than a single thick layer.
- Spread the filler in a smooth motion to avoid air bubbles.
- Feather the edges to blend seamlessly with the rest of the body.
Understanding Drying Time for Completely Dry Filler
The drying time of body filler depends on the temperature and humidity. On average, it takes about 20 to 30 minutes for the filler to completely dry. To test if the filler is ready for sanding, gently press the surface. If it feels hard and doesn’t leave a mark, it’s ready for the next step.
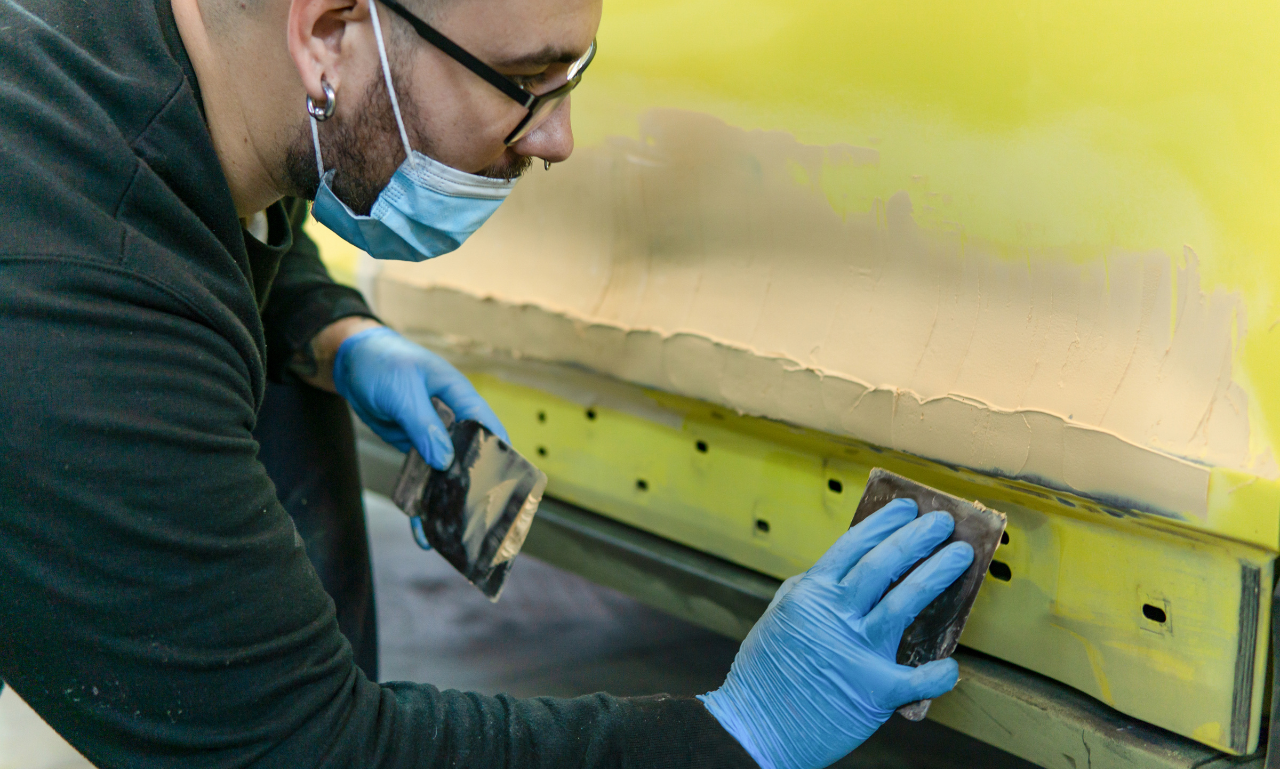
Sanding and Feather Edging the Filler
Techniques for Sanding Body Filler
Once the body filler has dried, it needs to be sanded down to achieve a smooth surface. The sanding body filler process involves:
- Starting with coarse sandpaper (80-grit) to shape the filler.
- Moving to medium grit (180-220 grit) to refine the shape.
- Finishing with fine sandpaper (320-400 grit) for a flawless finish.
Achieving a Seamless Blend with Featheredge Sanding
Featheredge sanding is the process of tapering the edges of the body filler so that it blends smoothly with the surrounding surface. This step ensures that there are no visible transitions between the repair filler and the rest of the vehicle.
Avoiding Pinholes and Imperfections in the Repair Process
Pinhole formation is a common issue when working with body fillers and putties. These tiny holes can be caused by improper mixing or air bubbles trapped in the filler. To prevent pinholes:
- Mix the body filler thoroughly.
- Apply in thin layers to avoid trapping air.
- Use a finishing glaze to fill any remaining imperfections.
Finishing the Repair with Glaze and Primer
When to Use Finishing Putty for Minor Damage
For minor dents and small imperfections, finishing putty is used to refine the surface before painting. It provides a self-leveling effect, making it ideal for final touch-ups.
How to Apply Primer for a Perfect Finish
Before painting, a primer must be applied over the sanded filler to create a smooth base. Here’s how to do it:
- Clean the surface to remove dust.
- Apply a thin layer of primer evenly.
- Allow it to dry completely before sanding lightly.
Using high-quality primers ensures that the body repair blends seamlessly with the rest of the vehicle.
Ensuring the Repaired Area is Free of Bugs and Debris
Before painting, it’s essential to make sure the surface is free of bugs, dust, and contaminants. Any foreign particles can cause imperfections in the final finish.
Common Mistakes to Avoid When Using Body Filler
When working on auto body repair, it’s essential to disconnect the battery to avoid short circuits. Understanding the automotive fuse box can help prevent electrical issues while sanding or applying filler.
Using Too Much Hardener or Resin
Adding excessive hardener can cause the body filler to dry too quickly, making it difficult to sand. On the other hand, using too little can prevent the filler from setting properly.
Not Allowing the Filler to Dry Completely
Attempting to sand wet or partially dry filler can ruin the repair. Always wait until the filler is completely dry before moving to the next step.
Failing to Properly Mix and Apply the Filler
Improper mixing can result in soft spots, pinholes, and weak adhesion. Always mix the polyester resin and hardener according to the manufacturer’s instructions.
Best Automotive Body Fillers in the Market
Comparing Evercoat Rage Ultra, Evercoat Rage Gold, and Platinum Plus
There are many automotive body fillers available, but three of the most popular are Evercoat Rage Ultra, Evercoat Rage Gold, and Platinum Plus Body Filler. Each has its advantages depending on the type of repair needed:
- Evercoat Rage Ultra – A premium-grade body filler that offers excellent sanding properties and a smooth surface. It’s ideal for professional body repair jobs.
- Evercoat Rage Gold – A high-performance gold lightweight body filler that provides superior adhesion and minimal shrinkage. It works well for dents and scratches.
- Platinum Plus Body Filler – A top-tier repair filler that is known for its self-leveling properties and ease of use.
These products are used widely in auto body repair shops and by DIY enthusiasts looking to achieve professional results.
Advantages of Evercoat Lite Weight Body and Evercoat Everglass
In addition to the premium products mentioned above, other notable options include:
- Evercoat Lite Weight Body Filler – A lightweight option that is easy to sand and ideal for minor damage.
- Evercoat Everglass – A fiberglass-reinforced body filler that is great for repairing damaged areas that require additional strength.
Reviewing 3M Bondo and Other Popular Auto Body Fillers
- 3M Bondo Body Filler is one of the most recognized automotive fillers on the market. It is known for being affordable and easy to use, making it a popular choice for beginner’s guide users.
- 3M Products are commonly used in automotive repair due to their durability and efficiency in fixing dents and scratches.
If you want to use auto body fillers effectively, choosing the right product is essential.
Fiberglass Body Repair vs. Traditional Fillers
The Role of Fiberglass in Body Fillers
When repairing auto body damage, choosing between fiberglass body fillers and traditional fillers is crucial. Fiberglass body fillers contain polyester resin reinforced with fiberglass strands, making them more durable. They are commonly used for repairs that require extra strength, such as:
- Rusted-out sections of a body panel
- Large dents and scratches
- Areas prone to stress or vibration
Polyester Resin vs. Traditional Putties
- Polyester resin-based fillers are stronger and more resistant to cracking.
- Traditional putties like finishing putty are best for minor damage and surface imperfections.
When to Use Fiberglass for Auto Body Repair
If the repair requires additional strength or involves rusted-out metal, using fiberglass body fillers is recommended. Otherwise, lightweight body fillers can be used for minor dents.
How to Repair Dents and Scratches with Auto Body Filler
Step-by-Step Guide for Repairing Minor Dents
- Clean the damaged area – Remove any dirt, grease, and rust.
- Sand the area – Use 80-grit sandpaper to roughen the surface.
- Apply body filler – Mix the polyester resin and cream hardener, then spread it with a plastic spreader.
- Let it dry – Ensure the filler is completely dry before sanding.
- Sand and featheredge – Use progressive sanding techniques to blend the filler into the rest of the vehicle.
- Apply finishing putty – Fill in any pinhole imperfections.
- Apply primer and paint – Protect the repaired area with primer and matching car paint.
Best Practices for Fixing Deep Scratches
For deep scratches, follow these steps:
- Use Evercoat Chrome-A-Lite or Evercoat Z-Grip for best adhesion.
- Sand the damaged area to ensure the filler bonds well.
- Apply thin layers of filler and allow proper drying before sanding.
Automotive Repair Tips for Beginners
A Beginner’s Guide to Using Automotive Body Filler
If you’re new to auto body repair, follow these essential tips:
- Always mix your filler correctly to avoid improper curing.
- Use a plastic spreader for even application.
- Sand in multiple stages, starting with coarse grit and moving to fine grit.
How to Select Filler for Different Types of Damage
- For small dents – Use a lightweight filler like Bondo Body Filler.
- For larger repairs – Choose Evercoat Rage Gold or Platinum Plus Body Filler.
- For rusted areas – Use a fiberglass-reinforced body filler such as Evercoat Everglass.
The Importance of Using the Right Automotive Filler
Choosing the right repair filler ensures:
- Long-lasting durability
- A smooth surface for painting
- A strong bond to the body panel
Expert Tips for Professional Body Repairs
Tips to Get the Best Results in Auto Body Repair
- Always use the right filler for the job.
- Avoid applying too thick a layer of filler, as it may crack.
- Sand the dry filler properly to prevent visible seams.
How to Use Bondo Body Filler Like a Pro
Use Bondo Body Filler correctly by:
- Mixing it well with cream hardener.
- Applying thin layers to build up the repair.
- Sanding between layers to create a smooth surface.
Ensuring Long-Lasting Repairs with Quality Materials
Using high-quality products like Evercoat Z-Grip, Evercoat Rage Ultra, and 3M Bondo Body Filler ensures long-lasting repairs. Investing in premium automotive body fillers and finishing putty helps achieve a flawless finish.
Conclusion and Final Thoughts
Using automotive body fillers is essential for auto body repair. Whether fixing minor dents, deep scratches, or rusted panels, choosing the right repair filler ensures professional results.
For the best outcomes:
- Select high-quality products like Evercoat Rage Ultra or 3M Bondo.
- Follow the correct application and sanding process.
- Use primer and finishing putty to achieve a smooth surface.
By following these guidelines, both beginners and professionals can successfully use auto body filler to restore a vehicle’s appearance.
FAQs
1. What is the best automotive body filler for beginners?
For beginners, 3M Bondo Body Filler is a great choice due to its ease of use and affordability. Evercoat Lite Weight Body Filler is another excellent option.
2. How long does body filler take to dry?
Most body fillers dry within 20-30 minutes, but the drying time can vary based on the temperature and the amount of hardener used.
3. Can body filler be used on rusted areas?
Yes, but the rust must be removed first. For rust-prone areas, use fiberglass body filler like Evercoat Everglass for added strength.
4. How many layers of body filler can I apply?
It’s best to apply thin layers, allowing each layer to dry completely before adding more. Avoid applying more than 1/4 inch at a time.
5. How do I avoid pinholes in body filler?
To prevent pinholes, mix the filler and hardener thoroughly, apply it in thin layers, and use a finishing glaze for final touch-ups.